01603 327962
Looking to upgrade your home lighting to be more energy-efficient and long-lasting?
Retrofit LED recessed lighting could be the perfect solution for you.
In this article, we will discuss what retrofit LED recessed lighting is, the benefits of choosing this type of lighting, and the step-by-step process of installing it in your home.
We will also provide some tips for a successful installation and common mistakes to avoid.
Stay tuned to learn more about how to transform your space with retrofit LED recessed lighting.

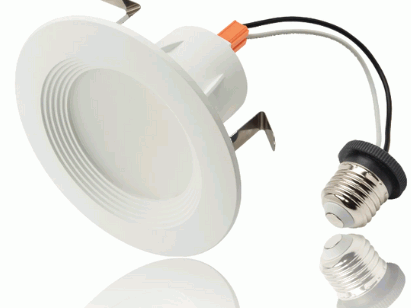
Retrofit LED recessed lighting involves upgrading existing light fittings with LED retrofit kits to provide efficient, modern lighting solutions for various interior spaces, including homes and offices.
LED retrofit kits typically include LED bulbs, a driver, and other necessary components, making it easy to convert older fittings to energy-efficient LEDs. On the other hand, recessed lights, also known as downlights, are versatile fittings that sit flush with the ceiling, offering a sleek and subtle lighting option. These retrofit solutions are not only cost-effective but also energy-efficient, reducing electricity bills and environmental impact. Whether in kitchens, living rooms, or commercial settings, retrofit LED recessed lighting adds a contemporary touch while enhancing visibility and ambiance.
Explore in-depth: Are LED Ceiling Lights Any Good
Selecting retrofit LED recessed lighting offers several benefits, including increased energy efficiency, longer lifespan of LED lights, and versatile design options suitable for various interior aesthetics.
Retrofit LED recessed lighting is highly energy-efficient, making it an eco-friendly choice for reducing electricity consumption and lowering utility bills.
LED lights are designed to consume significantly less electricity compared to traditional incandescent or fluorescent bulbs. These lights convert a greater percentage of energy into light rather than heat, resulting in lower energy waste. This improved efficiency not only translates to direct cost savings for the consumer but also has a positive impact on the environment by reducing overall electricity demand and greenhouse gas emissions.
One of the key benefits of retrofit LED recessed lighting is the longevity of LED lights, which significantly outlast traditional lighting options.
LED lights used with retrofit kits have an extended lifespan that can reach up to 50,000 hours or more, compared to the average lifespan of incandescent bulbs which is around 1,000 hours. This durability means that once installed, LED lights require minimal replacements, reducing the need for frequent maintenance and lowering overall operating costs. The longevity of these lights not only ensures consistent illumination but also contributes to environmental sustainability by reducing the number of disposed bulbs that end up in landfills.
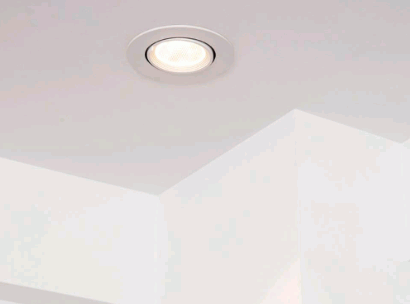
Retrofit LED recessed lighting offers versatility in design, allowing for various downlight styles that can seamlessly blend with different interior settings.
One of the key features of retrofit LED recessed lighting is its ability to offer a wide range of downlight styles that cater to different aesthetic preferences and lighting needs. Whether you prefer a sleek and modern look or a more traditional design, there are options available to suit your desired ambiance.
For contemporary spaces, a timeless downlight style can provide a clean and minimalist appearance, seamlessly integrating into the ceiling for a seamless look. On the other hand, adjustable gimbal downlights offer flexibility in directing the light beam, making them ideal for highlighting specific areas or artworks within a room.
Installing retrofit LED recessed lighting is a straightforward DIY project that can be accomplished by following a step-by-step tutorial, ensuring a successful upgrade with LED retrofit kits.
Having all the essential items at hand before beginning the installation is crucial to ensure a smooth and efficient process. Along with the mentioned tools, you will also need a ladder for reaching the ceiling, wire strippers, a voltage tester, and a screwdriver.
Make sure to check that you have the correct size and type of LED retrofit kit for your recessed lighting fixtures to avoid any compatibility issues during the installation.
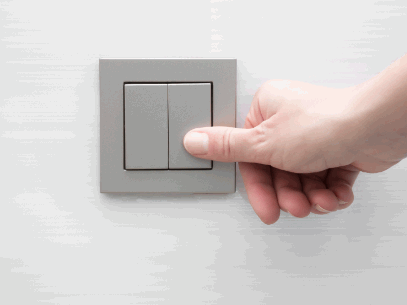
Before beginning any electrical work, it's crucial to switch off the power to the existing light fitting to ensure safety during the installation process.
Taking these precautions significantly reduces the risk of injury or damage.
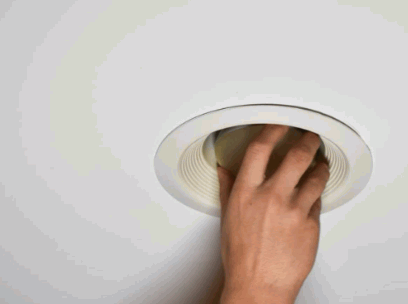
Carefully remove the existing light fitting by following the steps outlined in the tutorial, ensuring not to damage the ceiling or surrounding areas.
Prepare the ceiling for the installation of the new downlights by ensuring the housing and brackets are properly positioned and secured.
Once the housing and brackets are checked, the next crucial step is to identify the optimal placement for the downlights. This involves considering the room layout, furniture arrangement, and the desired lighting effect. Proper positioning is key to achieving an even distribution of light and avoiding glare or shadows. It is recommended to create a layout plan to mark the exact spots where the downlights will be installed. Double-check the ceiling material to determine if any additional support is needed for secure installation.
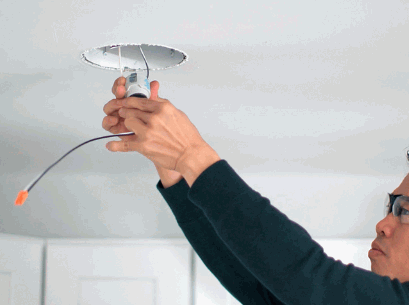
Connect the wiring for the retrofit LED recessed light, ensuring all electrical connections are secure and comply with safety standards.
It is essential to follow these steps diligently to avoid any electrical hazards and ensure a properly functioning lighting system.
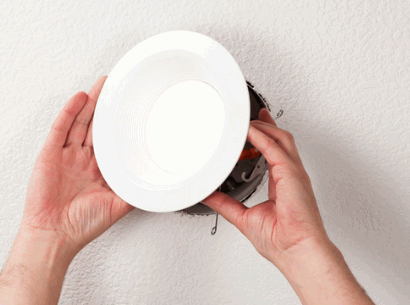
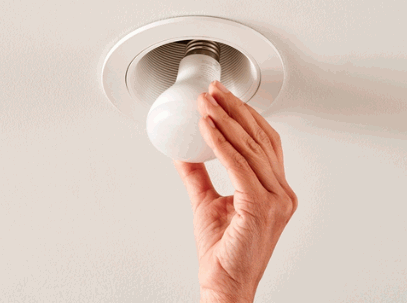
Install the retrofit LED recessed light by carefully positioning it into the ceiling and securing it with torsion springs, clips, or c-clips as needed.
After confirming the correct placement of the light, gently rotate the torsion springs in a clockwise motion to lock the fitting securely in place. Ensure that the clips or c-clips are properly aligned with the designated slots on the light housing.
Once everything is securely connected, test the light to ensure it functions properly before fully completing the installation. Take care to avoid over-tightening the torsion springs, as this may cause damage to the ceiling or the fitting.
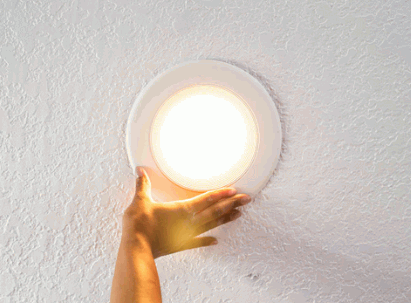
After installation, test the LED lights to ensure they are functioning properly and make any necessary adjustments as per the tutorial.
Testing the lights post-installation is crucial to guarantee optimal performance and safety. Start by checking each light fitting individually, ensuring they are securely in place and connected properly. Then, switch on the lights to observe if they illuminate as expected, without flickering or dimming. If any issues arise, consult the instructional manual for troubleshooting steps. Adjust the positioning or angle of the lights if needed to achieve the desired lighting effect. Remember that thorough testing ensures a seamless and enjoyable lighting experience.
To ensure a smooth and efficient installation of retrofit LED recessed lighting, consider these helpful tips that can guide you through the DIY process and help avoid common pitfalls.
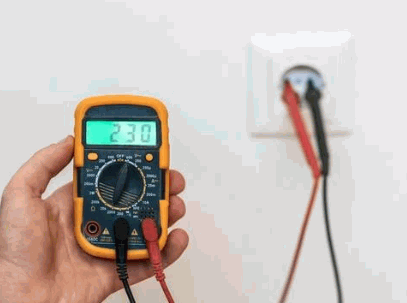
Using a voltage tester is crucial to ensure electrical safety during the installation of retrofit LED recessed lighting.
Before starting any electrical work, always remember safety first. One important step in this process is checking for live wires using a voltage tester.
Always follow the manufacturer's instructions provided with your LED retrofit kits to ensure a correct and safe installation.
These guides are carefully crafted to streamline the process and prevent any potential hazards that may arise from incorrect installation methods. They typically include step-by-step procedures, recommended tools, and safety precautions to be followed during the setup. Adhering to these instructions not only guarantees efficient performance but also extends the lifespan of your LED lighting system.
Some common steps covered in the guide may include identifying the right fixtures for your space, ensuring proper wiring connections, and testing the lights post-installation. They often emphasize the significance of turning off the power supply before commencing any work and handling the components with care to avoid damage.
If you are unsure about handling electrical wiring or the installation process, consider hiring a professional to ensure the job is done safely and correctly.
Electrical wiring can be a complex and potentially hazardous task that requires specific knowledge and skills to execute properly. A professional electrician possesses the expertise to navigate the intricacies of electrical systems, ensuring that all connections are secure, circuits are correctly set up, and safety measures are implemented.
Professionals are equipped with the necessary tools and equipment to conduct the installation efficiently and effectively. They can also identify and troubleshoot any potential issues that may arise during the process, providing a seamless and reliable solution. By hiring a professional, you not only save time and effort but also minimise the risk of accidents or errors.
When installing retrofit LED recessed lighting, it's important to be aware of common mistakes that can hinder the process and affect the final outcome, especially for DIY enthusiasts.
One of the most critical mistakes is not turning off the power before starting the installation, which poses significant safety risks.
Inadequately shutting off the power supply can result in electrical shocks, fires, or even fatalities. It's essential to locate the main circuit breaker or fuse box and switch off the power to the specific area where the installation will take place. This step is vital in preventing accidental contact with live wires.
Once the power is turned off, double-check by using a non-contact voltage tester to ensure there is no electricity running through the circuits. These testers are affordable and can save lives by indicating the presence of current.
It's advisable to inform others in the household or workplace about the power shutdown to avoid any accidental reconnection. Taking these precautions will help create a safe working environment during the installation process.
Incorrect wiring can lead to malfunctioning lights and potential safety hazards, making it essential to follow proper wiring techniques during installation.
Aside from safety concerns, correct wiring also ensures optimal performance and efficiency of electrical systems. One common mistake is not securing connections properly, leading to loose wires and potential short circuits.
Regular testing using a multimeter can help confirm that all connections are functioning as they should. Remember, taking the time to wire things correctly can save you from headaches down the road.
Not measuring the ceiling space properly for downlights can result in improper fitting and alignment issues during the installation.
Accurate measurements are crucial to ensure that the downlights fit seamlessly into the ceiling, enhancing the overall aesthetics of the room. To measure the ceiling space correctly, start by determining the placement of each downlight. Use a measuring tape to find the exact distances between each intended fixture location. It's also important to account for any obstructions or existing fixtures that may impact the installation process.
Investing in tools like a laser level or a stud finder can greatly assist in achieving precise measurements. A laser level helps you mark accurate positions on the ceiling, while a stud finder can identify any structural elements that may affect the installation.